Registry adalah bagian besar dari Windows. Ini adalah basis data yang menyimpan pengaturan paling penting yang membantu sistem operasi dan aplikasi tertentu untuk bekerja.

 Untuk mengekspor dan menimpa file yang ada, gunakan contoh berikut:
 Untuk menyimpan dan menimpa file yang ada, gunakan contoh berikut:
Anda biasanya menggunakan "Penyunting Registri" untuk mengubah database saat Anda perlu memperbaiki masalah, mengaktifkan fitur rahasia, atau meningkatkan fungsi tertentu. Namun, Anda mungkin tidak tahu bahwa Windows 10, mirip dengan versi sebelumnya, termasuk reg.exe, yang merupakan alat baris perintah yang memungkinkan Anda juga mengedit Registry menggunakan Command Prompt.
Reg.exe hadir di dalam sistem operasi, dan itu termasuk fungsi yang sama yang ditemukan di Registry Editor (GUI). Anda bahkan dapat mengedit entri lebih cepat, karena Anda tidak perlu menelusuri secara manual database pohon yang membingungkan. Dan Anda mendapatkan fleksibilitas untuk dapat menerapkan tweak di Registry menggunakan skrip.
Dalam panduan Windows 10 ini, kami akan memandu Anda melalui langkah-langkah untuk mulai menggunakan Reg.exe untuk mengedit Registry menggunakan Command Prompt.
Cara mengedit Registry menggunakan Command Prompt
Penting: Jika Anda berencana untuk menggunakan perintah ini di komputer Anda, pastikan untuk memahami bahwa memodifikasi Registry berisiko, dan dapat menyebabkan kerusakan permanen pada pemasangan Anda jika Anda tidak melakukannya dengan benar. Disarankan untuk membuat cadangan lengkap komputer Anda sebelum melanjutkan.
To run reg.exe, you first need to start Command Prompt as an administrator with the following steps:
- Open Start.
- Search for Command Prompt.
- Right-click the result and select Run as administrator.
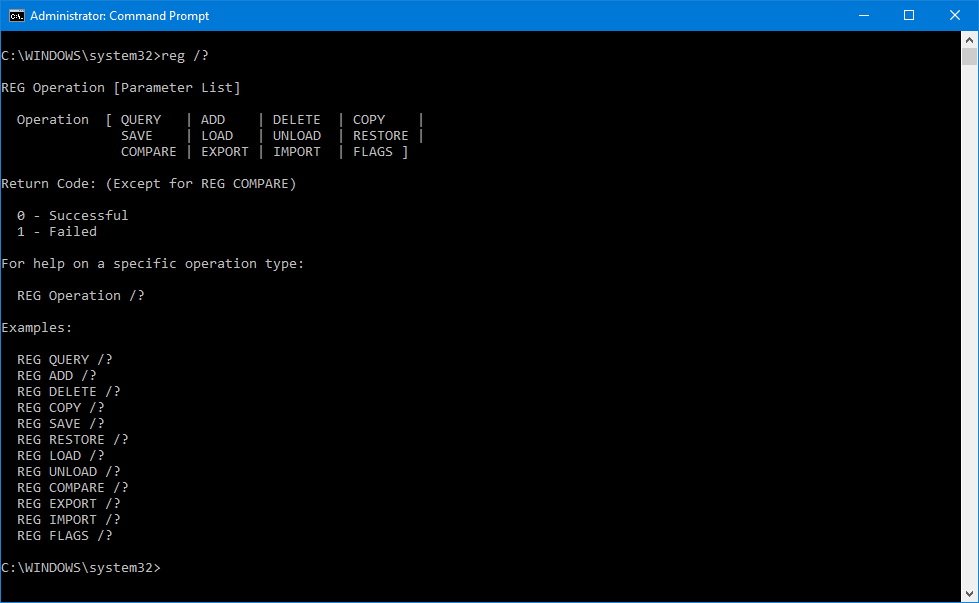
- To run the tool, type the following command and press Enter:
reg /?
This command will display all the operation types you can use, including:
- REG Query
- REG Add
- REG Delete
- REG Copy
- REG Save
- REG Load
- REG Unload
- REG Restore
- REG Compare
- REG Export
- REG Import
- REG Flags
Note: You can also use REG followed by the operation type and /? to get more help. For example, REG QUERY /? or REG ADD /?.
You'll also get the return codes: 0 meaning that the operation completed successfully, and 1 indicating that the operation failed. However, you won't get any return codes using the Compare switch.
While there a long list of possible command combinations, below we'll be listing the most useful commands to get started using reg.exe with Command Prompt.
How to add and delete registry entries
Syntax
- Add:
REG ADD KeyName [{/v ValueName | /ve}] [/t Type] [/f] - Delete:
REG DELETE KeyName [{/v ValueName | /ve | /va}] [/f]
Command description
- KeyName: Defines the path to the subkey or entry. Valid registry key shortcuts include HKLM, HKCU, HKCR, HKU, and HKCC. If you're trying to edit the registry on a remote computer, you can only use these shortcuts: HKLM and HKU.
- /v ValueName: Specifies the name for the registry key to be added or deleted.
- /ve: Defines if you're adding or deleting an entry that has a null value.
- /t Type: Specifies the type of registry entries. Here's the list of valid types:
- REG_SZ
- REG_MULTI_SZ
- REG_DWORD_BIG_ENDIAN
- REG_DWORD
- REG_BINARY
- REG_DWORD_LITTLE_ENDIAN
- REG_LINK
- REG_FULL_RESOURCE_DESCRIPTOR
- REG_EXPAND_SZ
- /f: Adds or deletes registry content without prompting for confirmation.
- /s Separator: Defines the character you use to separate multiple instances of data when the REG_MULTI_SZ data type is specified and you need to add more than one entry. The default separator is \0 if it is not specified.
- /d Data: Specifies the data for the new entry in the registry.
REG ADD examples
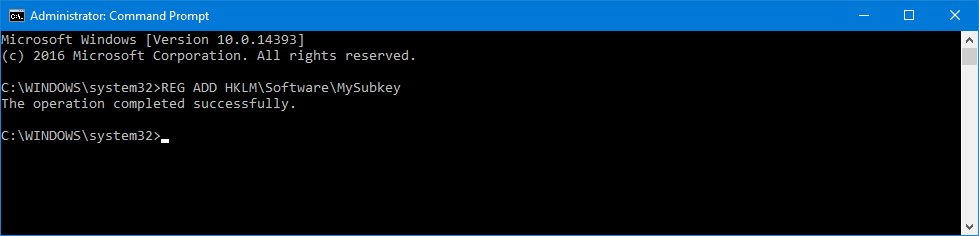
To add a subkey named MySubkey under HKEY_LOCAL_MACHINE\Software, use the following example:
REG ADD HKLM\Software\MySubkey
To add a new DWORD (32-bit) value entry named AppInfo with the value of 1, use the following example:
REG ADD HKLM\Software\MySubkey /v AppInfo /t REG_DWORD /d 1
To add a new DWORD (32-bit) value entry named AppInfo with value of 1 on a remote computer, use the following example:
REG ADD \\ComputerName\HKLM\Software\MySubkey /v AppInfo /t REG_DWORD /d 1
To add a new Binary Value entry named Data with data of fe340ead, use the following example:
REG ADD HKLM\Software\MySubkey /v Data /t REG_BINARY /d fe340ead
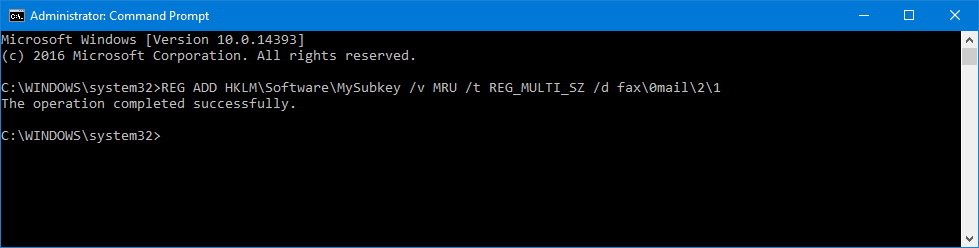
To add a registry entry with multiple values to MySubkey with a value name of MRU of type REG_MULTI_SZ and data of fax\0mail\2\1, use the following example:
REG ADD HKLM\Software\MySubkey /v MRU /t REG_MULTI_SZ /d fax\0mail\2\1
To add an expanded registry entry to MySubkey with a value name of Path of type REG_EXPAND_SZ and data of %systemroot%, use the following example:
REG ADD HKLM\Software\MySubkey /v Path /t REG_EXPAND_SZ /d ^%systemroot^%REG DELETE examples
To delete the subkey named MySubkey, use the following example:
REG DELETE HKLM\Software\MySubkey /f
To delete the subkey named MySubkey on a remote computer, use the following example:
REG DELETE \\ComputerName\HKLM\Software\MySubkey /f
To delete the registry entry named AppInfo within the MySubkey subkey, use the following example:
REG DELETE HKLM\Software\MySubkey /v AppInfo /f
To delete only the registry entries that have no value inside the subkey named MySubkey, use the following example:
REG DELETE HKLM\Software\MySubkey /ve
To delete all the registry entries from the MySubkey subkey, use the following example:
REG DELETE HKLM\Software\MySubkey /vaHow to copy registry entries
Syntax
- Copy:
REG COPY KeyName1 KeyName2 [/s] [/f]
Command description
- KeyName1: Defines the path to the subkey you want to copy. Valid registry key shortcuts include HKLM, HKCU, HKCR, HKU, and HKCC. If you're trying to copy the registry on a remote computer, you can only use these shortcuts: HKLM and HKU.
- KeyName2: Defines the path to the subkey destination. Valid registry key shortcuts include HKLM, HKCU, HKCR, HKU, and HKCC. If you're trying to copy the registry on a remote computer, you can only use these shortcuts: HKLM and HKU.
- /s: Copies all subkeys and entries of a particular subkey.
- /f: Executes the copy command without prompting for confirmation.
REG COPY examples
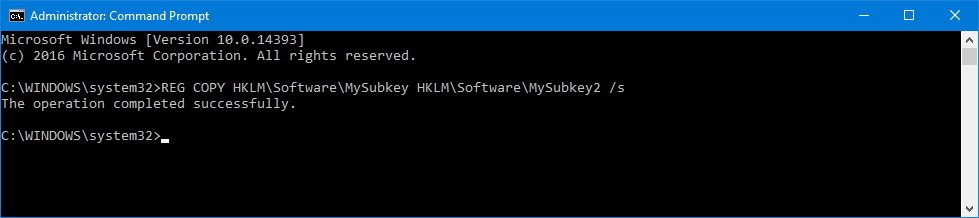
To copy all subkeys and values under the key MySubkey1 to the key MySubkey2, use the following example:
REG COPY HKLM\Software\MySubkey1 HKLM\Software\MySubkey2 /s
To copy all values under the subkey MySubkey1 from a remote computer to the subkey MySubkey2 on the a new computer, use the following example:
REG COPY \\ComputerName\HKLM\Software\MySubkey1 HKLM\Software\MySubkey2How to export and import registry entries
Syntax
- Export:
REG EXPORT KeyName FileName [/y] - Import:
REG IMPORT FileName
Command description
- KeyName: Defines the path to the subkey or entry. Valid registry key shortcuts include HKLM, HKCU, HKCR, HKU, and HKCC.
- FileName: Specifies the name and path of the .reg file to be exported or imported.
- /y: Overwrites the registry content without prompting for confirmation.
REG EXPORT examples
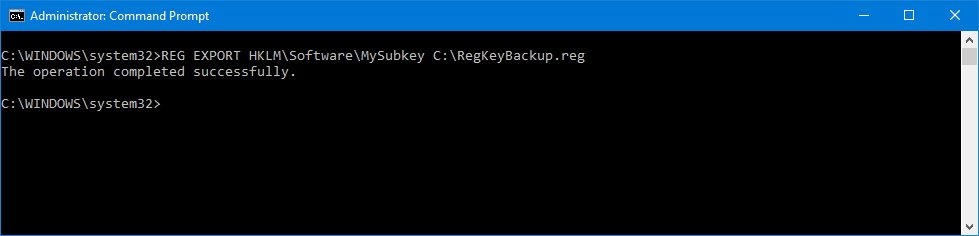
To export all the content within the subkey MySubkey, use the following example:
REG EXPORT HKLM\Software\MySubkey C:\RegKeyBackup.reg
REG EKSPOR HKLM \ Software \ MySubkey C: \ RegKeyBackup.reg / y
Daftarkan contoh IMPOR
Untuk mengimpor semua konten, termasuk subkunci, entri, dan nilai dalam subkunci bernama MySubkey, gunakan contoh berikut:
REG IMPORT C: \ RegKeyBackup.reg
Bagaimana cara menyimpan dan mengembalikan entri registri
Sintaksis
Simpan: REG SAVE KeyName FileName [/ y]
Kembalikan: REG RESTORE KeyName FileName
Keterangan perintah
KeyName: Menentukan jalur ke subkunci atau entri. Shortcut kunci registri yang valid termasuk HKLM, HKCU, HKCR, HKU, dan HKCC. Jika Anda mencoba mengedit registri pada komputer jarak jauh, Anda hanya dapat menggunakan pintasan ini: HKLM dan HKU.
NamaFile: Menentukan nama dan jalur file .hiv untuk disimpan atau dikembalikan.
/ y: Menimpa isi registri tanpa meminta konfirmasi.
REG HEMATKAN contoh
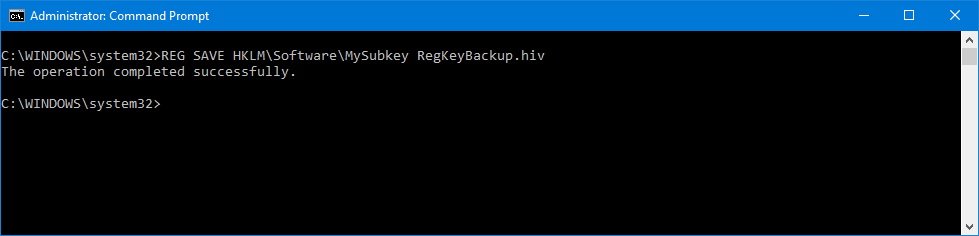
Untuk menyimpan salinan subkunci, entri, dan nilai dalam subkunci bernama MySubkey, gunakan contoh berikut:
REG SAVE HKLM \ Software \ MySubkey C: \ RegKeyBackup.hiv
REG SAVE HKLM \ Software \ MySubkey C: \ RegKeyBackup.hiv / y
Berikan contoh RESTORE
Untuk memulihkan semua konten, termasuk subkunci, entri, dan nilai dalam subkunci bernama MySubkey, gunakan contoh berikut:
REG RESTORE HKLM \ Software \ MySubkey C: \ RegKeyBackup.hiv
Wrapping things up
Meskipun Anda selalu dapat menggunakan Editor Registri, Anda akan menemukan bahwa terkadang lebih mudah dan lebih cepat untuk menggunakan alat baris perintah reg.exe. Namun, pada akhirnya, Anda masih akan mengedit Registry, yang berbahaya tidak peduli alat apa yang Anda gunakan.
Juga, pastikan untuk memeriksa ulang perintah Anda sebelum mengeksekusi, karena Anda dapat melakukan kesalahan. Sebagai contoh, REG ADD HKLM \ Sofware \ MySubkey tidak sama dengan REG ADD HKLM \ Software \ MySubkey. Kesalahan seperti itu mungkin tidak melakukan apa-apa, atau bisa merusak seluruh sistem Anda. Jadi hati-hati.
Jika Anda bertanya-tanya, ya, ada perbedaan besar antara Ekspor dan Simpan. Perintah EXPORT mengekspor konten registri ke dalam format teks yang Anda dapat dengan mudah mendistribusikan sebagai file .reg ke komputer lain.
Di sisi lain, SAVE menyimpan konten registri ke dalam format file sarang (.hiv), yang mempertahankan kepemilikan dan informasi penting lainnya. Anda hanya harus menggunakan perintah ini jika Anda mengembalikan entri ke komputer yang sama.
Penting juga untuk dicatat bahwa meskipun Anda dapat menggunakan banyak dari perintah ini pada komputer jarak jauh, IMPOR dan EKSPOR hanya bekerja pada komputer lokal (tidak melalui jaringan).
Meskipun, kami memfokuskan panduan ini untuk Windows 10, perlu diingat bahwa reg.exe telah menjadi bagian dari sistem operasi untuk waktu yang lama, karena ini juga harus bekerja pada Windows 8.1 dan Windows 7.
Apakah Anda lebih suka menggunakan Registry Editor atau reg.exe untuk memodifikasi Registry Windows? Beritahu kami di komentar di bawah ini.
0 Comment: